
No Job is Too Big or Too Small!

What Is Cure UV Resin and How Does It Work?

Cure UV Resin hardens when suitable ultraviolet light activates photoinitiators inside the liquid material. Those molecules trigger a chemical reaction, linking resin components into a solid polymer. The change can happen within seconds, but cure time depends on the resin formula, light wavelength, layer thickness, and lamp distance. A small pendant may cure evenly; a deep, cloudy casting may not.

Photopolymerization researcher Dr. Christopher N. Bowman’s work offers a useful principle, paraphrased here rather than quoted verbatim: “Light starts the reaction; resin chemistry completes the cure.” That distinction matters. A bright lamp alone cannot guarantee a fully cured piece. Pigments, trapped air, or thick layers can block light, leaving soft material beneath a firm surface. Sometimes the outside looks finished, while the center is not.

This guide explains how Cure UV Resin works, what affects its curing performance, and how to spot common problems. You will learn why matching the lamp to the resin matters, and why thin, even layers often cure more reliably. A practical check: inspect the piece from several angles and follow the product maker’s curing instructions. Wear suitable gloves and eye protection, and work with good ventilation. Resin handling can be messy. Even experienced makers can misjudge a cure. That deserves a second look.
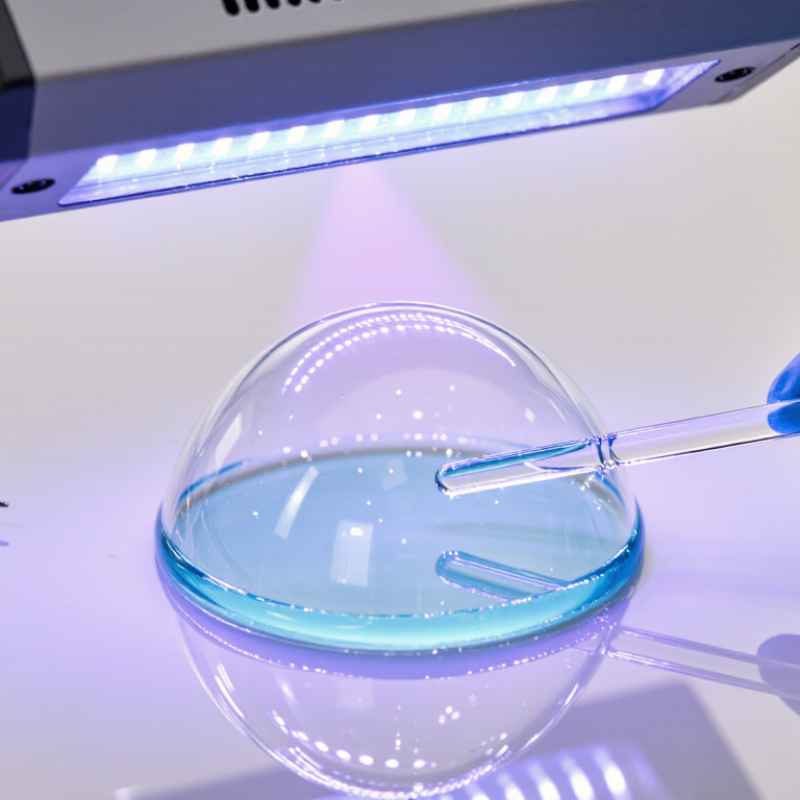
What Is Cure UV Resin and How Does It Work?

What Is UV-Curable Resin?

UV-curable resin is a liquid material that hardens when exposed to ultraviolet light. It usually contains reactive molecules and a photoinitiator. The photoinitiator absorbs suitable UV energy and creates reactive species, which link the resin’s molecules into a solid polymer network. Light starts the change.

The process can take seconds to several minutes, depending on the resin, lamp, layer thickness, and exposure distance. A thin, clear layer may cure evenly under a small UV lamp. A thick or colored layer can block light, leaving soft resin beneath a hardened surface. For that reason, makers often cure resin in thin layers and follow the material’s specified wavelength and exposure guidance.

A cured piece may feel firm but still have a slightly sticky surface. Oxygen at the surface can interfere with curing, and limited light exposure can also leave uncured material behind. Avoid touching liquid resin directly; use suitable gloves and work with good ventilation. I have found that small test pieces reveal problems sooner than a large pour. Even then, curing results can vary, so appearance alone is not a reliable check of complete hardening.

What Ingredients Give UV Resin Its Light-Activated Properties?

UV resin is not a single ingredient. Its light response comes mainly from a photoinitiator, blended with resin-forming oligomers and smaller reactive diluents. When suitable UV light reaches the photoinitiator, it produces reactive species that start polymerization. The liquid network then hardens. The details matter.

Photoinitiators are the trigger. Their chemistry determines which wavelengths can start curing and how efficiently. Oligomers build the cured material’s basic structure, affecting hardness and flexibility. Reactive diluents lower viscosity, helping resin flow around a tiny charm or into a shallow mold; they also become part of the solid network. Stabilizers, pigments, and other additives can adjust storage life, color, or surface quality. They can also slow curing if the balance is poor. A thin, clear layer may harden while a dark, thick spot stays tacky. That’s frustrating, but useful to notice.

Grand View Research’s UV-curable resins market report valued the global market at about US$5.4 billion in 2023, reflecting broad industrial use, not proof that every formulation cures alike. In practice, light wavelength, layer thickness, pigment, and exposure time all affect results. Oxygen can also interfere with surface curing in some formulations. One limitation is easy to overlook: more exposure does not always fix a resin that lacks the right photoinitiator or light match. The chemistry has to fit the lamp.

How Does Ultraviolet Light Turn Liquid Resin into a Solid?

UV resin hardens when ultraviolet light activates a small amount of photoinitiator mixed into the liquid. That is the trigger. The activated molecules create reactive particles that join resin molecules into longer chains. As these chains connect, they form a solid polymer network. The liquid does not simply dry out; its chemistry changes. The light’s wavelength must suit the resin’s photoinitiator, or curing may be slow or incomplete.

Curing depends on more than shining a lamp at the surface. Light intensity, exposure time, resin color, and layer thickness all affect how deeply the reaction proceeds. A thin, clear layer may harden quickly, while pigment or a deep pour can leave softer material underneath. A tacky surface can also result when oxygen interferes with curing. The chemistry sounds tidy; real results are less tidy. Check the resin’s instructions, use suitable eye and skin protection, and allow good ventilation. If a piece feels firm on top but bends below, give it more exposure only when the product guidance allows it.

What Is Cure UV Resin and How Does It Work? — How Does Ultraviolet Light Turn Liquid Resin into a Solid?

Topic What Happens Practical Details
What UV-curable resin is A liquid formulation that hardens when exposed to a suitable wavelength of ultraviolet or near-ultraviolet light. Many hobby and coating formulations contain reactive acrylate or similar compounds, a photoinitiator, and optional additives such as pigments or fillers.
Role of the photoinitiator The photoinitiator absorbs light energy and produces reactive species, commonly free radicals, that start the curing reaction. The initiator must absorb light emitted by the lamp. A lamp’s wavelength and the resin’s formulation therefore need to be compatible.
How liquid becomes solid Reactive molecules link together into longer chains and a cross-linked polymer network, transforming the liquid into a solid material. This process is called photopolymerization. Curing is a chemical reaction, not simply drying by evaporation.
Common light wavelengths UV-curable products are designed for specific parts of the UV spectrum; some are also formulated for violet light near 405 nm. 365 nm and 385–405 nm are common lamp wavelengths for different products, but they are not interchangeable for every resin. Follow the product’s stated wavelength range.
Light intensity and distance Light delivers the energy needed to initiate and continue curing. Greater distance or blocked light can reduce the energy reaching the resin. Keep the lamp at the distance recommended for the resin and avoid shadows. A lamp’s rated electrical power alone does not establish the light intensity at the work surface.
Layer thickness and transparency Light is absorbed or scattered as it travels through resin, so the surface may cure more readily than deeper material. Thick, dark, opaque, or heavily filled sections may cure unevenly. Thin layers and clear materials generally allow light to reach deeper areas more effectively.
Curing time There is no single curing time that applies to all UV resins or lamps. Time depends on formulation, wavelength, light intensity, distance, layer thickness, color, and temperature. Use the manufacturer’s instructions and test a small sample when conditions change.
Surface tackiness Some free-radical acrylate resins can remain tacky at the air-exposed surface because oxygen interferes with the surface reaction. A tacky surface does not necessarily mean the entire piece is uncured. Follow the product’s finishing guidance; do not handle uncured resin with bare skin.
One-sided or two-sided exposure Light reaches the side facing the lamp most directly, while the reverse side may receive less exposure. For suitable thin objects, curing each side separately can improve exposure. This does not guarantee that light will penetrate a thick or opaque piece.
Safety while curing UV and violet lamps can pose risks to eyes and skin, and uncured resin can irritate or sensitize skin. Use appropriate UV-blocking eye protection, cover exposed skin, work with ventilation, and follow the resin and lamp safety instructions. Keep uncured resin off skin and away from children and pets.

Key point: UV light starts the resin’s polymerization reaction, but a reliable cure requires the correct wavelength and sufficient light exposure for the specific formulation and object geometry.

Which Factors Affect UV Resin Curing?

UV resin hardens when ultraviolet light activates photoinitiators in the liquid. The light’s wavelength must match the resin’s formulation. A lamp that looks bright may still emit an unsuitable wavelength. Check the product’s technical instructions rather than relying on appearance alone.

Distance and light intensity matter. Moving a lamp farther away can reduce the energy reaching the resin. Short, even exposures usually work better than shining light on one spot for a long time. Layer thickness matters, too. Thick pours can leave a soft center because light cannot reach it evenly. Dark pigments, glitter, and opaque inclusions can block light. Use thin layers when the resin’s depth limit is unclear. This part is easy to misjudge.

Temperature can change how quickly resin flows and cures; cold conditions may slow the process. Dust, moisture, or residue on a mold can also affect the surface. Some formulas remain slightly tacky where air contacts them, so follow the maker’s curing guidance before adding another layer. Wear suitable eye protection, and avoid looking directly at an active UV lamp. A careful test on a small sample can reveal whether the lamp, layer depth, and exposure time work together.

What Is UV Resin and How Does It Cure?

UV resin is a liquid resin that hardens when light activates its photoinitiators, triggering polymerization. The chart compares common curing factors using qualitative influence ratings—not standardized lab measurements. Actual results depend on the resin formulation and curing setup.

A suitable wavelength and sufficient light intensity help activate the resin. Longer exposure can improve curing when light reaches the material, while thicker layers and pigments or fillers can limit light penetration. Follow the resin maker’s instructions and cure in thin layers when needed.

What Are the Common Uses and Handling Risks of UV Resin?

UV resin is a liquid photopolymer that hardens when exposed to suitable ultraviolet light. Makers use it for small jewelry pieces, decorative charms, miniature models, protective coatings, and shallow repairs. Its quick cure suits thin layers and detailed work. It is less reliable in thick, dark, or enclosed shapes, where light may not reach the center.

Handle uncured resin carefully. It can irritate skin and eyes, and repeated contact may cause sensitization. Wear nitrile gloves and eye protection, and work with good ventilation. Avoid breathing fumes.

Keep resin off clothing and household surfaces. Follow the product’s safety instructions when cleaning spills; do not wipe them up with bare fingers. Cure pieces in thin layers, rotating them if needed, and check hidden areas before handling.

A surface may feel hard while resin underneath remains tacky. That detail is easy to miss.

Follow the product label and safety data sheet, and keep resin away from children and pets. UV lamps can also harm eyes, so do not stare into the light. If curing remains uneven, pause and reassess the layer thickness.

Article Source: